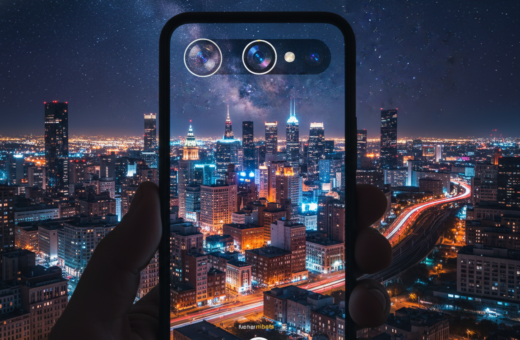
This article explains why a phone camera often misjudges light in low scenes and what you can do about it.
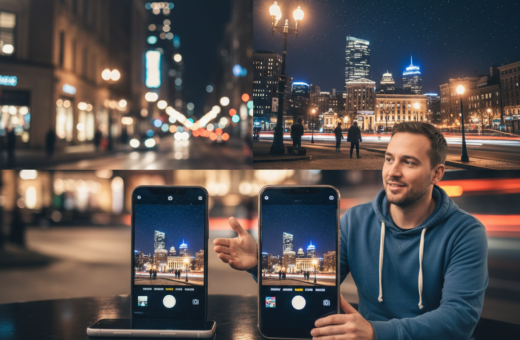
The Note 21 Pro packs a 64MP main camera and strong specs, but its system can still struggle when the scene has little light. Many phones shift settings in ways that create blur or dim photos.
You will learn how shutter speed, lens limits, and phone software shape results. The guide shows simple settings and apps that let you override the system.
Follow these tips to get clearer photos from your phones. With a bit of manual control and attention to shutter speed, you can make your cameras behave more like pro gear.
Understanding Smartphone Camera Limitations in Low Light
Small sensors and fast software edits often decide the fate of a dim scene long before you tap the shutter. This section explains the two main bottlenecks that shape the final image on a phone camera.
Sensor Size Constraints
Physical limits matter. Most phones use compact sensors that capture less light than larger camera chips. Less light means more noise and softer detail in low-lit scenes.
About 70% of U.S. adults own a phone, yet few realize how much sensor area affects a photo. For many subjects, the sensor simply cannot gather enough photons to create a clean image.
Software Processing Hurdles
Modern systems rely on heavy software to compensate for hardware limits. Algorithms try to brighten shadows, reduce grain, and balance color.
That processing can misread the scene or the subject, producing odd tones or motion blur when the system chooses an aggressive mode.
“Smart software helps, but it cannot replace light that was never captured.”
- Noise reduction can erase fine detail.
- HDR blending may ghost moving subjects.
- Aggressive sharpening introduces artifacts.
Understanding these hurdles is the first step to better images. This article will show practical settings and apps that give you more control over the final photo.
Why Automatic Exposure Failure Night Photography Smartphone Fix Is Essential
When light is scarce, your phone camera can misjudge the scene and produce disappointing shots. This is why a targeted automatic exposure failure night photography smartphone fix matters for most users.
Practical reasons to care:
- About 70% of U.S. adults own a smartphone, so the number of people facing these issues is large.
- The camera system often needs extra time to process dim scenes, which can slow the shutter and cause blur.
- Small sensors and quick software choices may not interpret the light in the scene correctly.
Use this guide to learn how to override default settings in your phone camera apps and try simple apps that grant manual controls. Doing so cuts processing time, stabilizes the shutter, and improves final photo quality.
The Role of Sensors and Image Noise
A phone’s sensor size sets a hard cap on the amount of usable light that reaches each pixel. That limit directly affects how clean your images look when the scene is dim.
Understanding ISO and Grain
Sensors in most phone camera modules are much smaller than those in dedicated cameras. The smaller area means the sensor gathers less light, so electronics must boost the signal to make the image visible.
That boost is called ISO on many apps. When the ISO rises, the sensor amplifies both signal and noise. The result is visible grain that degrades a photo’s detail.
Pro photographers know the lens and sensor capabilities set the baseline for image quality. No amount of software can recover light that wasn’t captured at the sensor level.
- Smaller sensors increase noise in low light.
- Higher ISO adds grain and reduces fine detail.
- Controlling the amount of gain keeps images clearer.
“Limit the gain and add more light or stability to reduce noise.”
Understanding how your phone handles light helps you reduce common issues. Adjusting settings or using support tools can keep the sensor’s limits from dictating the final camera result.
Mastering Manual Exposure Controls
A few simple controls put you in charge of how your phone records light and motion. Learning to use metering, shutter speed, and locks stops the app from guessing and gives you repeatable results.
Tapping for Metering
Tap the screen where your subject sits to set the metering point. Spot metering can target roughly the central 5% of the frame so the phone reads light from the most important area.
This is one of the fastest ways to override the system and protect highlights or shadows where it matters most.
Adjusting Shutter Speed
Open a manual mode or pro mode in your camera app to set shutter speed. Keep the speed at or above 1/60th second when handholding to avoid blur from shaky hands.
Slower speeds can bring in more light, but they need a tripod or very still subjects. Many apps show an icon or slider to change speed and aperture.
Locking Exposure
Use the exposure lock button to freeze your settings while you reframe. This prevents the system from shifting brightness when you move the phone.
- Tapping the screen sets the metering point and overrides the default system.
- Keep shutter at 1/60th or faster for pin-sharp handheld images.
- Locking exposure stops the camera from chasing changing light as you compose.
Mastering these controls solves many common issues caused by software decisions. With a bit of practice you will get more consistent photos and fuller control over the final image.
Managing White Balance for Better Color Accuracy
Color starts with white balance. Set the white balance so the camera records true tones under the light in your scene.
If an image looks too blue or too orange, switch the white balance mode in your camera settings. Most apps show a small icon—tap it to pick presets such as daylight, cloudy, tungsten, or fluorescent.
For mixed lighting, try the custom or Kelvin option. Point the camera at a neutral area near your subject and set the temp until skin tones and whites look natural.
- Why it matters: Proper white balance keeps colors true and reduces post-editing time.
- Quick tip: Use the camera icon to switch modes fast when the scene changes.
- Pro result: Correct white balance makes your phone images look more professional with minimal effort.
“Adjusting white balance is one of the simplest ways to gain control over color in low-light scenes.”
Using External Tools to Stabilize Your Shots
Mounting your device on a reliable tripod makes a dramatic difference for low-light captures and long exposures.
Use a sturdy tripod like the Gorillapod to hold the phone steady. A stable base prevents blur when you choose a slow shutter or long speed in pro mode.
Keep the phone camera perfectly still so the sensor can gather a larger amount of light. That reduces noise and improves the overall image quality.
Trigger remotely with a small button or the self-timer to avoid touching the device. This simple step stops camera shake from the button press.
- Tripods let the lens stay aimed precisely at your subject for sharp results.
- Using a remote button or timer further cuts the chance of blur.
- Investing in a quality tripod and grip solves many common stability issues for phone users.
“A good support system lets the camera do its job: record light cleanly and keep details intact.”
Overcoming Dynamic Range Challenges
Scenes with both bright highlights and deep shadows create a common camera challenge. Dynamic range is the term for a sensor’s ability to hold detail in both extremes.
When the dynamic range is limited, a phone may blow out bright areas or crush dark tones. That creates images missing important detail in the sky or in shadowed subjects.
Use HDR mode to let the system blend multiple frames and expand the range the final image shows. Many photographers rely on HDR to keep both highlights and shadows readable.
- Tip: Switch to a pro or manual mode when possible and lower gain to reduce noise.
- Tap to meter on the most important part of the scene and lock your settings before you recompose.
- Know the terms: dynamic range, highlight clipping, and shadow roll-off so you can diagnose problems fast.
“Expanding dynamic range starts with the right mode and steady technique.”
Advanced Techniques for Night Photography
Skilled shooters use layered captures and smart apps to push a phone camera past its default limits.
Start in manual mode and set shutter speed and ISO yourself. This gives you direct control over how the sensor records light and reduces aggressive software adjustments.
Use a third-party app that supports RAW and frame stacking. Capture several frames at varied settings and combine them to lower noise and boost detail.
- Stabilize: use a tripod and remote trigger to hold the subject steady during longer speeds.
- Stacking: merge multiple images to improve final quality without raising ISO too high.
- Tweak software: choose apps that let you fine-tune denoise and sharpening separately.
“Combining control, steady support, and the right apps expands what phones and cameras can achieve.”
Conclusion
, Taking control of light and motion turns many tricky scenes into a solid image. This short guide and article gave clear tips and steps to help you shoot with purpose.
Use manual mode, lock key settings, and steady support to cut blur and noise. Practice delivering consistent results. Try the same settings on repeat to learn how your phone reacts.
Keep experimenting: aim for two good images each session and review them with intent. With time you will gain confidence and better technical skill in low-light photography.