Many users find low light images lose depth. Phone sensors and aggressive software can smooth noise and boost exposure. That can make the subject look flat and color shifts may occur, as some Pixel models have shown.
The Google Pixel 6 set a high bar with its camera bar and bold processing. Yet later models, like a report from a Reddit user about a Pixel 9 Pro, show how algorithms can misrender an orange Ford Mustang as red. These examples highlight a common problem: software aims to correct light but can erase natural shadows and texture.
Understanding sensor limits and exposure choices is the first step. Simple editing steps, better settings, and the right apps can recover color and depth. For a practical guide and sample steps, see this step-by-step reference.
Why Smartphone Cameras Struggle in Low Light
Small sensors and heavy processing make low-light captures a consistent challenge for most phone cameras. That mix of hardware limits and aggressive software explains why many images lose depth when light is scarce.
The Impact of Post-Processing
Manufacturers add powerful image features to brighten shadows and reduce noise. Those features can help, but they also risk introducing grain or color shifts.
“Combining frames to lift exposure can erase fine texture and create blur.”
HDR and multi-frame modes merge several exposures to expand dynamic range. In low light, that process can cause blur if the camera or subject moves. A flash may help at very close range, but at distance it often leaves the subject too bright or creates harsh highlights.
Sensor Limitations
A phone sensor has limited area, so it collects less light than larger camera sensors. To compensate, the shutter stays open longer, which increases the chance of motion blur.
- The main problem is the sensor size that limits how much light is captured.
- Longer shutter time makes images vulnerable to blur from small movements.
- Using a tripod is a simple tip to stabilize the camera and reduce blur.
Quick tip: Try manual mode or an app with longer exposure options and keep the device steady to preserve color and shadows.
Understanding the Night Photos Washed Out Smartphone Fix Contrast Workflow
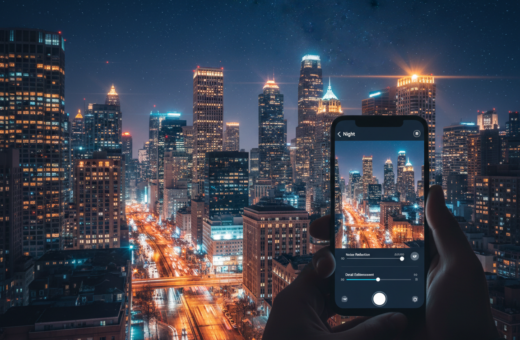
A clear workflow turns inconsistent low-light captures into reliable results every time. Start by recognizing the camera often lifts exposure to brighten a scene. That process can erase natural shadow and color that made the image feel real.
Step one: check the original image histogram or view areas that look flat. If highlights are clipped or midtones lack depth, the phone likely over-exposed the scene.
Next, use an editing app that supports tone and curve controls. Gently lower exposure if needed, then raise midtone contrast to restore deeper blacks and more vivid color. Work in small steps and compare before/after frequently.
- Balance light and shadow rather than pushing global brightness.
- Prefer RAW capture when the camera and app allow it—RAW holds more recoverable detail.
- Save edits as a copy so the original image remains intact.
“Good editing respects the scene’s original light and brings depth back without overdoing it.”
Adjusting Camera Settings for Better Night Shots
A few deliberate setting changes turn unpredictable low light captures into reliable images. Take a moment in the viewfinder to set exposure and shadow limits so the scene keeps texture and tone.
Managing Brightness and Shadows
Lower brightness and deepen shadows in your camera app before you snap. This prevents the software from over-brightening the subject and losing detail.
On some devices, like the Pixel 8, you can tweak these controls directly in the viewfinder. Lock the exposure when you find a balance so the shutter and HDR mode behave predictably.
Using RAW Format
Shoot RAW when possible. RAW preserves sensor data and gives you more room to fix exposure and restore color in editing.
“RAW keeps the original detail you need to rescue highlights and bring back natural tone.”
Avoiding Digital Zoom
Digital zoom crops the image and increases noise. Move closer or crop later from a full-resolution file for a better camera result.
- Manually lower brightness and shadows before shooting.
- Use RAW for later editing of low light photos.
- Skip digital zoom to keep images sharp and clean.
The Role of Hardware and Accessories
Good hardware and the right add-ons make a big difference when you need steady low light captures. Stabilization keeps the sensor still so the shutter can gather light without blur.
Stabilize first, tweak later. A solid tripod is the top tool for crisp night time photos. It prevents hand-shake during long exposure and cuts noise from re-scanning by the camera.
Stabilization Techniques
Use a tripod whenever possible. Many tripod models fold small and fit in a pocket or bag. That makes them ideal for travel and street photography.
- Tripod: Essential for long exposure mode and sharp image capture.
- If you lack a tripod, rest the phone on a wall or table to steady the shutter.
- Use a remote release or timer to avoid touching the phone during the shot.
“Even tiny motion ruins detail when the exposure runs long.”
These simple hardware steps help preserve texture and color that software alone cannot recover. They work across many models and phone cameras to improve low light results.
Essential Post-Processing Techniques
Final edits often decide whether an image feels flat or full of life. Post-processing is the last stage where you can correct brightness and bring depth back into low light images.
Start with global adjustments. Lower exposure slightly if highlights look blown, then lift the midtone contrast to deepen blacks and make the subject pop.
Use selective tools in your camera app or an editing app to darken shadows and recover detail in highlights. That restores dynamic range without creating harsh edges.
“Use gentle HDR effects — they can add range but also increase noise if overdone.”
- Work in small steps and toggle before/after to avoid overprocessing.
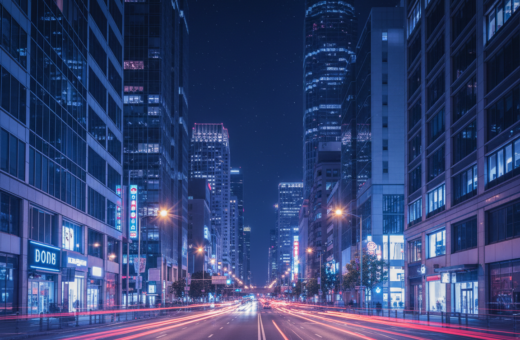
- Try long exposure adjustments in available iOS or android app options for smoother light trails.
- Save edits as a copy so the original image remains unchanged.
Tip: prioritize shadow control and moderate brightness. That preserves texture from the sensor and gives a more natural final photo for better camera results.
Recommended Apps for Enhanced Night Photography
Choosing the right apps gives you control over exposure, shutter, and RAW data so your images retain depth.
Manual Control Apps
Camera FV-5 brings DSLR-like controls to Android. You can set shutter speed, ISO, and focus manually to reduce blur and preserve texture.
A Better Camera is affordable and includes a dedicated night mode that manages light more effectively than many default camera apps. These tools help you treat the sensor and shutter like real options instead of guessing with automatic settings.
Editing Suites
Snapseed is a free, powerful app for photo editing on both Android and iOS. Use its curves, selective tools, and RAW support to recover color and depth in an image.
“Use manual capture first, then edit gently to restore natural tone.”
- Download Camera FV-5 to get manual shutter and sensor control.
- Use Snapseed for professional-grade photo editing and RAW processing.
- Try A Better Camera for a simple night mode that improves light handling.
Tip: Most of these apps are available iOS and Android so any phone model can gain better camera options. Pair them with a tripod to maximize sharpness and take time to edit carefully.
Conclusion
Conclusion
strong, A reliable workflow combines camera control, stabilization, and gentle post-processing to restore natural tones.
Start with manual settings and shoot RAW when available. Use a tripod or stable surface and avoid digital zoom to keep detail sharp. Practice different exposure and brightness values to learn how your device responds.
Use editing apps like Snapseed to recover color and midtone contrast without overdoing edits. Save copies so you can compare versions as you learn.
With steady technique, the right gear, and ongoing practice, you can capture compelling night images that keep depth, color, and professional quality.