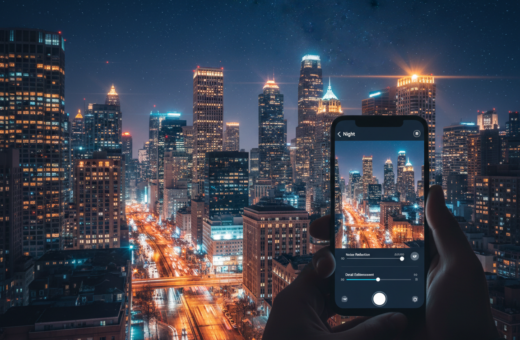
The PicMonkey exposure tool now gives mobile users precise control over brightness and contrast. In 2026, this kind of control helps save an image that might otherwise look unusable.
Professional mobile apps let photographers adjust tone, highlight detail, and boost clarity without complex workflows. A few smart sliders can make a dark photo readable and crisp.
When you shoot in low light, the post-capture step becomes vital. Using the right tools on your device can lift shadow detail and balance exposure quickly.
Why this matters: mastering basic adjustments keeps your portfolio consistent and helps you save shots taken with imperfect settings. PicMonkey and similar tools bring desktop power to your pocket.
Understanding Exposure and Why Night Photos Fail
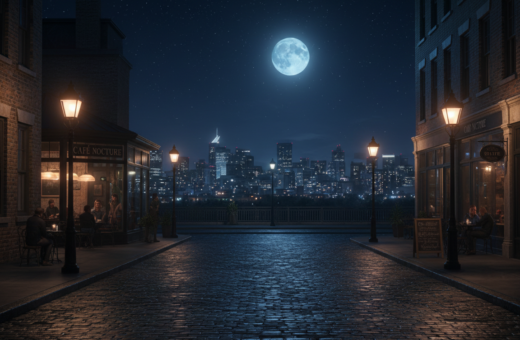
Low light scenes push cameras to their limits, so understanding exposure is key. Exposure controls how much light hits the sensor and shapes the overall look of a scene. When the range between bright and dark areas is wide, a camera can miss important detail.
The Science of Light
Dynamic range describes the gap between the brightest highlights and deepest shadows. Many phone and compact camera sensors can’t capture that full range in one shot. Tools like Adobe Lightroom and Photoshop add specialized sliders to pull detail from both ends of the scale.
Identifying Underexposure
A quick way to spot a dim image is blocked shadows or blown highlights. If areas look solid black or white, the camera didn’t record usable information. Adjusting shadows and highlights sliders is a reliable way to bring back detail without making the image look artificial.
- Check histogram and key settings at the time of capture.
- Address large contrast with longer exposure or added light where possible.
- Use software sliders later to balance areas and keep a natural look.
How to Recover Underexposed Night Photos Smartphone Editing
A dim shot isn’t always lost—many apps can pull out texture and tone with a few taps.
Start with proven apps: Snapseed, Pixlr, and Camera Zoom FX Premium are fast and capable. Camera Zoom FX Premium sells for $3.99 on Android and gives manual controls that speed up fixes on the go.
Open the underexposed photo and check the basic exposure and brightness tools first. The exposure slider brightens the whole image without heavy noise when you nudge it carefully.
Use Aperture Priority (Av/A) when you shoot to capture more light — an f1.8 aperture helps a lot. Proper camera settings like lower ISO and wider aperture reduce the work you need to do later.
- Adjust exposure and brightness to reveal hidden detail.
- Try the shadows and highlights controls to balance contrast.
- Working on your phone saves a lot of time versus moving images to a desktop.
Tip: Learn one app well. Mastering a single workflow cuts editing time and improves your photography results.
Advanced Slider Techniques for Better Image Clarity
Mastering slider adjustments gives you direct control over how much detail returns to a photo. Use each control with intent: shadows bring back dark areas, highlights restore bright zones, and contrast ties everything together. Small, careful moves produce the most natural results.
Using the Shadows Slider
The shadows slider brightens dim parts of an image without touching the bright areas. Nudge it slowly and watch texture reappear in blocked zones.
Tip: Raise shadows a little, then step back. Overdoing it creates flat, washed results.
Adjusting Highlights and Contrast
The highlights slider recovers detail in bright areas that might otherwise look blown out. Lower it to regain tone in bright skies or reflective surfaces.
Then use contrast to keep the difference between light and dark areas balanced. A modest contrast boost can make recovered detail read clearly.
Avoiding Artificial Looks
Every slider serves a purpose. Push them too far and the image will lose a natural look.
“Pull the exposure slider to the extreme left or right to check if detail is truly gone or simply hidden.”
- Use shadows to lift dark areas without affecting highlights.
- Use highlights to restore bright-area detail.
- Adjust contrast to maintain visual balance.
- Check image information by testing the exposure slider extremes.
Conclusion: Mastering Night Photography and Post-Processing
Getting great low-light results starts with the right camera settings and a steady workflow.
Make time to practice. Small adjustments to exposure and settings at capture cut down later work and keep the image natural.
A lot of the final work happens in the editing phase, where careful slider moves bring back true details without making the shot look fake.
Save edited images as separate files so you can try different looks without losing originals. With practice, fixing dim photos will feel like second nature and improve your overall photography.