Mastering low-light photography starts with understanding that your phone and a $2,000 Nikkor 14-24mm f/2.8 lens follow the same optical rules.
When you capture a night scene, the sensor, lens flare, and motion blur all shape the final image. Overprocessing can make a shot look fake.
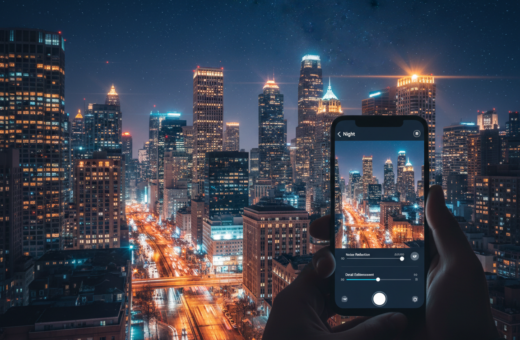
Use a tripod and night mode to keep the camera steady. That reduces noise and avoids relying on heavy software fixes.
Balance shutter speed and sensor sensitivity so color and light stay natural. Manage screen brightness and color settings so the result on your display matches the captured scene.
In this guide, we’ll explain practical ways to control motion, lens flare, and HDR pitfalls. You’ll learn how to get crisp images that respect the mood of the evening without creating harsh edges or odd artifacts.
Understanding the Physics of Low-Light Photography
In dim scenes, the physics of light, not your editing app, sets what the final frame can show.
The Role of Sensor Noise
The sensor in a camera acts as a light collector. Modern phones amplify the signal to capture more light, which also raises noise.
Higher ISO and longer exposures help gather photons, but they make grain and reduce fine details in images. Watch shutter speed and settings so motion does not blur the shot.
Managing Dynamic Range
Low light scenes often hide detail in shadows or blow highlights from bright lamps. Phone mode and HDR try to merge exposures to fix this.
High-end cameras use larger sensors and better optics to hold more dynamic range. For phone photography, learn how your phone’s night mode and HDR work so results look natural rather than overprocessed.
- Balance exposure and color to keep images realistic.
- Limit ISO spikes to reduce noise in low light.
- Use steady support to allow slower shutter speed when needed.
Essential Hardware Preparation for Night Shoots
Before you press the shutter, make sure your gear is clean and stable. A quick check of optics and support prevents common issues in low light.
Cleaning Your Lens Properly
Wipe the lens in circular motions from the center outward using a microfiber cloth. This removes skin oils and smudges that scatter light and soften images.
A dirty lens is the main reason pictures lose contrast and form odd flares. Even top-tier cameras will give poor results if glass is greasy.
- Use a microfiber cloth only; paper towels and tissues can scratch coatings.
- Carry a small tripod to keep the camera steady during long shutter shots.
- Clean the phone camera lens before every session to improve image clarity and result consistency.
Preparing hardware—cleaning the lens and mounting a tripod—sets the stage for crisp, realistic images. It is the first step toward professional-looking night photography.
How to Sharpen Night Photos Smartphone Without Halos
Small, targeted adjustments often rescue an evening frame better than heavy global fixes.
Keep edits local. Use masks or brushes to apply clarity only to textured areas. That prevents bright sources from gaining artificial edges and keeps the overall image natural.
Remember the hardware matters. Tests between the Nexus 6P and Pixel show some phone camera designs produce more lens flare. If your device flares easily, rely less on extreme processing.
Lower the intensity of sharpening tools. A light amount preserves fine detail in low light scenes and stops ugly rings around lamps. Check results on a high-resolution screen so small artifacts are visible before you export.
- Prefer local contrast over global sharpness.
- Use a steady shutter and a clean lens to reduce the need for heavy fixes.
- Verify the final image on larger displays for an honest result.
Mastering Exposure and ISO Settings
Proper exposure keeps color and detail intact when ambient light is low. Get exposure under control before you chase clarity in post. Small changes to settings have large effects on final results.
Balancing Shutter Speed
Adjust shutter speed to let in more light, but watch motion. A slower shutter gathers detail from dim light sources, yet it increases blur from moving subjects and camera shake.
Use a tripod when exposure time gets long. If handheld, raise ISO slightly to keep shutter speed fast enough to freeze motion.
Manual White Balance Control
Set white balance in manual mode to match artificial light sources. This gives you faithful color and reduces the need for heavy color correction later.
“Verify exposure and color on your screen before you shoot—auto modes can misread complex scenes.”
- Keep ISO between 400 and 800 to balance light capture and noise.
- Use manual exposure time when your phone or camera allows it.
- Check the screen histogram and highlights to avoid clipped exposures.
Stabilization Techniques to Prevent Motion Blur
A steady setup lets you extend exposure time and capture cleaner night scenes.
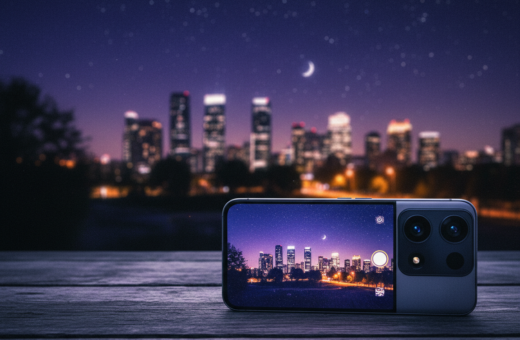
Use a tripod whenever possible. A rigid support removes camera motion so you can lower shutter speed and keep noise down. Even a compact tabletop tripod beats handholding in low light.
When a tripod isn’t available, improvise. Rest the phone or camera on a wall, bag, or a rock to steady the lens. Small adjustments to position make a big difference for long exposures.
Activate night mode with care. The camera often stacks multiple exposures; any movement during capture creates motion blur across frames. Use a remote shutter, wired trigger, or the self-timer to avoid vibration from touching the device.
Long exposure is ideal for light trails, but it demands a perfectly still rig so the rest of the scene stays sharp. Eliminate motion and you let your phone or camera reach its limits for clean, low light images.
“Preventing motion at capture is the most effective way to get sharp night images.”
- Mount: tripod or stable platform.
- Trigger: remote or timer to avoid vibration.
- Technique: steady for long exposures and light trails.
Creative Use of Ambient Light Sources
City lights do more than brighten a scene; they shape form and mood when used on purpose.
Sculpting with Street Lamps
Place your subject so a lamp casts directional glow across a face or texture. That contrast creates depth and leads the eye.
Move the camera or subject slightly to test how the lamp changes shadows and highlights. Watch the lens to avoid flare from bright fixtures.
Using Light Painting
During long exposures, use a small flashlight to paint foreground elements. A brief sweep can reveal details that the sensor missed.
Use a tripod and slow shutter. On phone mode, try manual exposures to keep the painted area natural and steady.
Managing Reflections
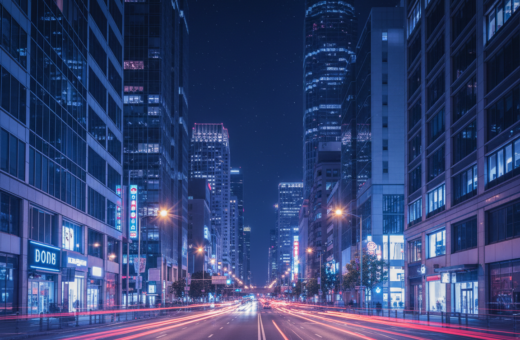
Wet streets and puddles double light sources and add striking color to an image. Compose to include reflections for symmetry or lead lines.
- Mind mixed color temperatures; warm lamps and cool signs create mood.
- Experiment with light trails and slow exposures to turn traffic into flowing strokes.
- Check how the lens handles bright spots and adjust angle to reduce flare.
Advanced RAW Processing for Clean Details
Shooting RAW gives you the headroom to rescue shadow detail that JPEGs simply discard. This file holds more sensor data and lets you push exposure and color with less harm to an image.
In post, adjust white balance and exposure first. That fixes color casts common in low light scenes and restores the natural tone of light sources.
Use targeted noise reduction on textured areas only. Apply masks so the sky stays smooth while lens and foreground retain fine details.
Work on a calibrated screen to ensure what you see in the editor matches your final output. Calibration preserves subtle color and prevents surprises when you export.
“RAW processing gives you precise control over exposure and color while keeping the file’s native detail.”
- Recover shadow detail safely.
- Target noise reduction to protect edges and texture.
- Verify results on a calibrated screen before export.
Common Mistakes That Cause Artificial Artifacts
Using default camera settings in dim scenes often invites noise and odd artifacts. Auto mode can push the sensor and create grain that hides fine detail.
Choosing too fast a shutter speed in low light forces higher ISO on phones and cameras. The result is grainy shots that lack crisp texture.
Failing to stabilize the rig leads to motion blur. Many try aggressive post work to fix it and end up with glowing edges around bright spots.
Overusing HDR or heavy stacking in night photography can flatten contrast and produce strange local tones. Check each adjustment at full size.
“Small smudges on a lens scatter light and make flares that look like defects.”
- Turn off full auto and control exposure and white balance.
- Use a tripod or steady support to avoid motion and reduce noise.
- Clean the lens before every session and limit HDR stacking at night.
Conclusion: Achieving Professional Results
Bring intention to every frame by planning light, angle, and support before you tap the shutter. Small choices at capture yield big results for low light work.
Practice and patience matter. I had a camping night photo printed by Artbeat Studios and rated the print 29/30 for overall quality. That proof showed a phone file can reach gallery-grade output.
Master your camera settings, lock stability, and treat RAW files with care. With steady technique and modest edits you can make each shot look clean and true to the scene.
Now go out, experiment with your phone, and consider printing your favorites to judge real-world quality.