Rick McEvoy is a professional photographer in England with over 40 years of experience. He explains how to manage low light in plain English so you can improve each image fast.
In under 27 minutes his podcast shows simple steps to adjust your camera and exposure settings. You will learn how your phone reads a scene and why bright backgrounds can trick the meter.
Good light management keeps detail in both highlights and the dark areas. A steady tripod helps when your camera needs longer time to gather light. These small changes make your photos look professional.
Before you shoot, check settings on your phone or camera. With a few practical tips you can take photo results that stay bright and rich in detail without complex edits.
Understanding Why Your Smartphone Photos Appear Dark
Your camera’s meter tries to average a scene, so black subjects can end up looking grey in images. That is the core reason many images look underlit. Cameras are programmed to aim for a middle tone, not pure black or pure white.
Bright backgrounds often trick a phone into lowering the overall exposure. When a subject stands in front of a bright window or sky, the camera reduces light to protect highlights. The result can be a subject that becomes a silhouette or an image that appears too dim.
Different cameras and phones read light differently. Sensor calibration and algorithms vary, so two devices can produce different images of the same scene.
- Remember: the meter aims for middle grey, so very dark items can look lighter.
- Bright backgrounds can fool the meter and lead to an underlit subject.
- Each camera interprets light and tone in its own way.
Understanding these limits helps you change settings or composition to keep detail in both bright and dim areas. Learn this and you will take better photos with any phone or camera.
How to Fix Dark Night Photos Smartphone Exposure Shadows
Manual control is the quickest route to better low-light results. Start by switching your camera app to a manual or pro mode so you can change key camera settings yourself.
Manual Exposure Adjustments
Set a steady shutter speed around 1/60th of a second to let more light in while keeping handheld blur low. If your test shot looks too dim, add +1 or +2 exposure compensation and try again.
Balancing Light and Detail
Take the same scene several times with small changes. Change the shutter a notch, then change the ISO or compensation. This process shows how each setting affects highlights and midtones.
- Use dedicated camera apps to control shutter, ISO, and focus.
- Compare images to preserve detail without over-brightening the sky or background.
- The extra time spent testing often yields far better results than a single auto shot.
Mastering Tap to Expose Controls
Tapping the screen to set an exposure point gives you instant control over how the camera reads your subject.
Tap the area of the frame where your subject stands. The camera app then measures light from that point, not the whole scene. This prevents a bright background from forcing the subject into a silhouette.
After you tap, slide your finger up or down to change the brightness. Sliding up increases brightness and acts like manual exposure compensation. Slide down to reduce brightness if highlights look blown.
Every camera make organizes controls differently, but almost all modern phones include this tool. If a dark photo still looks underlit, raise the slider until the subject is clear.
- Quick tip: Tap the face or subject to prioritise light where it matters.
- Repeatable: Try several taps and small slider tweaks to find the best balance.
- Control: Using the phone camera directly helps the final photo match your creative vision.
The Role of ISO and Shutter Speed in Low Light
ISO and shutter speed together decide how much usable light your camera captures in low-light scenes. These two settings are the foundation of better night shooting and make a huge difference when taking photos indoors or outdoors after sunset.
Understanding Camera Sensitivity
Camera sensitivity (ISO) raises the sensor’s responsiveness to light. Increasing ISO to 800 or 1600 is a common choice for dim rooms because it helps the camera record more detail without hugely changing other settings.
Higher ISO can introduce digital noise. That trade-off is often worth it to save detail when you cannot add light.
Adjusting Shutter Speed
Shutter speed controls time. A very fast shutter like 1/1000th freezes motion but lets in little light. For low-light work, aim for slower values — around 1/60th is a practical starting point to reduce blur while gathering more light.
Use a long exposure when possible, but pair it with a tripod to keep images sharp.
- Remember: balance ISO and shutter to avoid noisy or blurry results.
- When taking photos in a light-dark scene, small changes in shutter time often help more than huge ISO jumps.
- These camera settings let you capture beautiful photos even when light is limited.
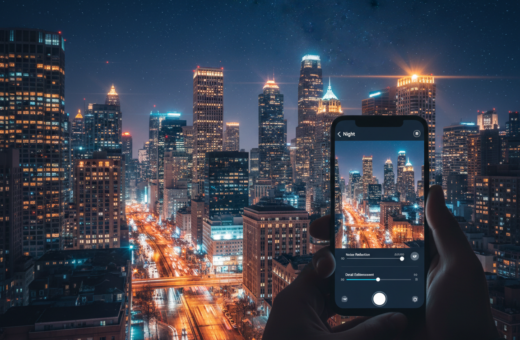
Utilizing Night Mode Features
Modern camera modes can brighten a scene automatically so you capture more detail with less effort. This is ideal when you want better photos without learning complex controls.
Start by letting the camera app decide. Many phones suggest a special mode when the environment is dim. It combines several frames and merges them to produce a brighter, cleaner result.
Activating Night Sight
On Pixel devices the Night Sight prompt often appears when the phone detects low light. Tap it and hold steady for the best results.
The iPhone 17 Pro Max includes a built-in feature that adds light to dark scenes automatically. If the result looks too warm or cool, adjust white balance in your camera settings.
“Let the software gather extra light while you steady the phone — the outcome often beats a rushed manual change.”
- Night mode is the easiest way to improve photos night performance without manual tweaks.
- Many modern phones use computational methods to combine frames into one clear image.
- Keep the camera steady and tweak white balance if colours shift.
For more on practical camera settings, see camera settings.
Benefits of Using a Tripod for Stability
A tripod lets your sensor gather light without the blur that comes from hand movement. This is critical when you use a slow shutter or aim for a long exposure to brighten a scene. With the camera steady, you can lower ISO and keep finer detail.
If you lack a tripod, rest your phone or camera on a flat surface like a wall, table, or bag. Small supports make a big difference when taking photos in low light. Even a short set of seconds with steady support improves results.
- Stability: A tripod is the best way to keep the camera still for long shutter times.
- Cleaner images: Lower ISO settings mean less digital noise and more detail in each photo.
- Practical tip: When you take photo sessions in the dark, tiny movement blurs the image—use a mount.
- Portable gain: A small travel tripod is an easy investment that pays off every time you shoot at night.
Managing Backlighting and Bright Backgrounds
Backlighting happens when a bright source sits behind your subject and can quickly turn them into a silhouette.
Move the subject or change your position so the main light hits their face. When you place the light behind you, the camera reads midtones more accurately and the subject looks natural.
If you must shoot into the light, raise exposure slightly or use the camera’s manual slider to brighten the subject. A small boost brings detail back without blowing the sky’s brightness.
Adjusting white balance helps when backlight gives colours an odd cast. Tweak the white balance setting so skin tones and colours look true.
- Manage backlighting because a bright background often tricks your camera into underexposing the main subject.
- A dark photo often happens when the camera balances a bright window or sky instead of the person.
- Use a flash or a reflector to add light back onto the subject for better brightness and detail.
“Move slightly, change your angle, or add a fill light — small adjustments make the photo readable and true to life.”
Advanced Camera App Upgrades
Third-party camera apps often add manual tools that let you shape light and detail more precisely. These apps put pro controls on your phone so you can tune shutter speed, ISO, and white balance for better results in dim scenes.
Camera Zoom FX
Camera Zoom FX adds fast controls and useful presets for both stills and long exposure work. It is popular for quick manual tweaks that improve phone camera output.
Camera FV-5
Camera FV-5 is a powerful Android tool that gives full manual control over ISO, shutter speed, and exposure for about $3.75. Use it to lock settings, take long exposures, and avoid blur when the scene needs more light.
A Better Camera
A Better Camera costs roughly $0.99 and includes a dedicated night mode plus manual adjustments. It also offers voice-activated shutter release so you can keep the phone steady during longer shots.
- Why upgrade: advanced apps unlock manual shutter control and improved camera settings.
- Compatibility: whether you use an iPhone 17 Pro Max or a Samsung Galaxy S25 Ultra, apps can expand what your hardware does.
- Result: sharper long exposure images and more control over light and detail.
“Third-party apps can unlock hidden potential in your phone camera and help you capture cleaner, more detailed images.”
Leveraging HDR for Better Dynamic Range
HDR blends multiple photos taken at different exposure levels to create a single image with a wider tonal range. This process helps the camera retain both bright highlights and dim areas so the final result looks balanced and natural.
How it works: the camera captures several frames quickly, then merges them to keep detail across the whole scene. Many modern cameras include HDR in the default mode, so you can get better results without complex settings.
In low light, HDR can produce blur because it combines multiple frames. For steady, clear results use a tripod. A tripod keeps the camera aligned so the merged image remains sharp.
Practical tips:
- Use HDR when you face high-contrast light to recover detail in both bright and dim areas.
- After HDR, check white balance and adjust it if colours look off.
- Use this mode sparingly in very dark scenes where motion causes blur.
“By balancing the light across the entire frame, HDR helps you produce a more professional and detailed final image.”
Post-Processing Techniques for Shadow Recovery
Post-processing can rescue detail that your camera missed when the scene was recorded. With careful edits you can recover dim areas and preserve highlight detail without making the whole image look unnatural.
Start with a clean raw file or the best available shot. Use a tool such as Snapseed to lift local tones, selectively brighten areas, and smooth noisy patches.
- Selective adjustments: target small zones to bring back texture and let light into underexposed areas without raising the overall exposure.
- Noise control: reduce grain in dim parts while keeping edges sharp so the image retains detail.
- White balance: correct colour casts from artificial sources to keep skin tones and colours true.
- Multiple shots: keep several frames at different settings — more source material gives better results when you merge or retouch.
“Good post-processing increases dynamic range and often saves shots that looked unusable at first.”
Mastering these photo editing steps will help your camera and apps produce usable images from low-light time and tricky light-dark scenes.
Avoiding Common Mistakes Like Digital Zoom
Most cameras simply crop when you zoom, so the result lacks true resolution. Digital zoom does not add detail; it magnifies pixels and makes blur and noise more visible. This hurts image quality, especially in low-light or night scenes.
Take photos at the native focal length and crop later in your editing apps. That approach keeps the sensor’s full resolution and lets you control final framing without losing sharpness.
Check your camera settings and mode to ensure you are not accidentally using zoom when you mean to change composition. Every camera make and many phones handle zoom differently, so verify how yours behaves.
- Avoid digital zoom—this tip improves sharpness and clarity for night photography.
- Crop later with your preferred apps to preserve detail and reduce noise.
- Shoot wide, keep shutter speed and exposure settings optimized, then refine at post time.
“By avoiding zoom in-camera you give yourself the best chance of clean, usable images.”
Conclusion
A few consistent habits will lift your results more than one perfect setting. Learn your controls, test small changes to shutter speed, and repeat shoots until you can reliably take photo with confidence.
Use a steady tripod when possible and try the built-in night mode and dedicated apps to expand what your device can do. These tools save time and improve clarity.
Remember: attend to white balance and keep practising—those tips make the difference between a blurry frame and beautiful photos. Stay patient, keep experimenting, and enjoy the creative results.