Capturing clear low-light images can feel frustrating when grain mars a great scene. This short guide shows practical steps to clean up images and keep fine detail.
Every shooter, from a beginner to a seasoned pro, meets this challenge when using a mobile camera under dim light. Understanding light and sensor sensitivity is the first move toward better results.
We will walk through easy, actionable steps you can apply after you capture a photo. Follow this approach to reduce grain, preserve detail, and make your final images look professional.
Key takeaways: Learn sensor behavior, apply targeted clean-up, and keep sharpness while removing grain.
Understanding Why Night Photos Look Grainy
When light is scarce, the sensor works harder and your images can get speckled. This happens because the camera amplifies a weak signal to make a visible image. That amplification often introduces unwanted noise and grain that change how photos look.
What is Image Noise
Image noise appears as random speckles of color or brightness. It is most visible in dark areas and can hide fine detail. In simple terms, the sensor is guessing when light is low, and those guesses create the mottled pattern you see.
The Impact of Sensor Size
Smaller or older camera sensors collect less light. That lack of light forces higher sensitivity settings such as high iso, which makes grain worse. Modern, larger sensors handle low light better and often keep images cleaner.
- When you’re shooting in low light, the sensor struggles to capture enough light and can introduce noise.
- A professional photographer knows that boosting sensitivity increases grain in night photos.
- Look closely: speckle texture means the sensor is failing to separate subject from background.
“Grain is a byproduct of the sensor trying to compensate for a lack of available light.”
The Role of ISO and Shutter Speed in Low Light
Controlling how long the shutter stays open is often the single biggest factor when shooting in low light. Shutter speed measures how long the camera lets light hit the sensor, while sensitivity sets how strongly the sensor amplifies that signal.
A very fast shutter like 1/1000s freezes motion but can leave a frame underexposed. In dim scenes, that underexposure forces higher sensitivity and more visible noise.
“Balance is key: longer exposure brings in light, while careful sensitivity keeps detail intact.”
- Shutter speed controls how long the sensor is exposed to light — crucial for clean night shots.
- Using a tripod lets you use slower shutter values so the camera can gather more light without boosting sensitivity.
- Fast shutter values may freeze motion but often make photos dark and grainy if exposure isn’t corrected.
- Adjusting shutter directly affects sensor light intake and the final exposure of your image.
Learn to pair reasonable sensitivity with slower shutter choices and stable support like a tripod. This balance keeps night scenes sharp and preserves detail for better post-processing.
How to iso noise smartphone night photography fix texture
Low-light captures often show unwanted grain that can hide fine detail. Addressing this at the source saves time in editing.
Inspect every image you take after a session. Look for mottled shadows and blown highlights. Mark frames that need cleanup or retakes.
Balance exposure first: raise exposure with longer shutter or steadier support before increasing sensitivity. This reduces grain and keeps the scene authentic.
- Review each photo to spot grain and bad areas.
- Use proper exposure to avoid heavy software rescue later.
- Combine careful capture with targeted denoising tools to preserve fine detail.
- If grain is excessive, tweak settings and reshoot when possible.
“Treat capture and cleanup as one workflow to preserve your original scene.”
Essential Hardware for Sharper Night Shots
Steady support is the single most effective upgrade for clearer low-light images. The right gear helps you gather more light while keeping your camera perfectly still.
The Importance of Tripod Stability
A sturdy tripod lets you use longer exposures so you can keep iso low and avoid boosting sensitivity. That strategy preserves detail and keeps grain to a minimum in night scenes.
Make sure the tripod sits on firm ground before you start an exposure. Even small vibrations blur fine detail and ruin otherwise sharp photos.
- Use a solid tripod to keep your camera perfectly still and keep iso low at night.
- Choose a model with a heavy base or spread the legs wide on a stable surface.
- When possible, add weight to the center column for extra steadiness during long exposures.
“A tripod is the most important piece of hardware for anyone who wants clean, sharp images in low light.”
Mastering Manual Camera Settings
A deliberate approach to camera settings keeps detail intact when light is limited. Start with control, then refine each element to protect fine detail in your shot.
Setting the Lowest Possible ISO
Always begin with the lowest possible ISO to ensure the cleanest image and least grain. Modern cameras handle values up to 800–1600 well, but past that grain grows more visible.
Adjusting Aperture for Light
Open the aperture to let more light reach the sensor. A wider aperture helps you keep ISO low and preserves small details in the subject.
Controlling Shutter Speed
Use shutter speed to manage exposure time. When you mount the camera on a tripod, you can choose a slower shutter to gather light without raising sensitivity.
- Make sure the aperture is wide enough before boosting ISO.
- When photos are too dark, a higher ISO is an option, but expect more grain.
- Practice manual camera settings to learn how aperture and shutter work together for a clean, professional shot.
“Mastering these settings gives you the freedom to capture sharp, well-exposed images even in dim scenes.”
Balancing Exposure to Minimize Digital Noise
Getting exposure right at the moment you press the shutter prevents many editing headaches later. Underexposing in camera forces big brightening in post. That step makes noise more visible and ruins fine detail.
Protect highlights and shadows by using a histogram as your guide. Aim for a broad spread of data without clipping. This keeps the scene natural and reduces the need for heavy adjustments.
It is often better to accept a slightly higher sensitivity and capture a correctly exposed image than to underexpose and try to rescue it later. Proper capture preserves tonal range and reduces visible grain across the frame.
- Underexposed photos make noise stand out when you brighten shadows.
- Raising exposure in post amplifies unwanted speckles across the whole image.
- Balance your exposure so the histogram shows data without clipped blacks or highlights.
- Correct exposure at capture is the best defense against digital grain in night shots.
“Expose for the scene first; edit for style second.”
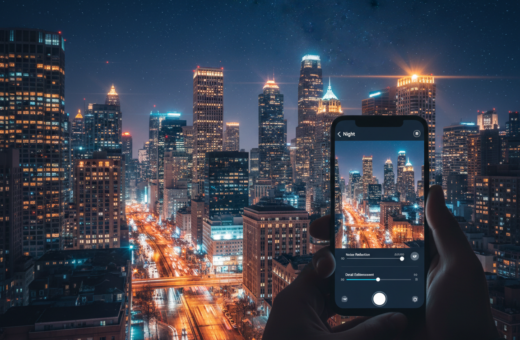
Using Night Mode and Multi-Frame Stacking
Using an automated stacking mode turns many imperfect frames into one strong capture. This approach relies on averaging to reduce visible noise and grain when available light is low. The result is clear photo output with notable detail reduction in artifacts.
When the mode runs, the camera records several short frames and merges them. That helps preserve edges and fine texture while smoothing speckles. Keep your shutter time mindful: faster values help moving subjects, slower values favor cleaner detail.
Always mount the device on a sturdy tripod for best alignment across frames. Misaligned frames create blur and ruin the stacking gain. Adjust settings so the base exposure is correct — good capture beats heavy rescue in post.
“Stacking turns many small captures into one precise final shot.”
Post-Processing Techniques for Noise Reduction
Smart use of sliders and masks lets you target problem areas without harming edges.
Start with a light, controlled approach in your editor. Apply global reductions first, then refine locally.
Luminance and Color Sliders
In Lightroom, open the Detail panel; in Photoshop use the “Reduce Noise” filter. Move the luminance slider slowly to tame grain while watching the image at 100%.
- Use the color slider to remove colored speckles in shadows.
- Keep adjustments subtle to avoid blotchy areas and lost edges.
- Work with masks to limit reduction to problem zones and preserve textures elsewhere.
Sharpening After Denoising
After reduction, apply selective sharpening to restore crispness. Focus on edges and small features to bring back lost detail.
“Always zoom to 100% when using sliders so you see real results and avoid over-processing.”
Mobile Apps for Cleaning Up Grainy Images
Editing apps now make it simple to smooth speckles and sharpen small details without a desktop.
Use trusted apps to handle post capture cleanup quickly. Adobe Lightroom Mobile brings powerful noise reduction tools similar to the desktop app. It excels at balancing denoise and sharpening for cleaner photos.
Snapseed is free and fast. The Structure and selective tools help reduce visible grain while preserving edges. It is a great option for quick on-device edits.
Noiseware focuses on denoising. The app gives simple controls to remove speckles and recover detail in images. You do not need complex software to fix grainy frames.
- Edit on the device to avoid file transfers and speed up your workflow.
- Use selective masks to protect important edges when you reduce noise.
- Prepare images before you post so your audience sees clean, professional results.
“Carry the right app and you can clean up a rough photo in minutes.”
Advanced Workflow for Professional Results
A reliable, repeatable workflow separates casual snaps from pro-quality low-light shots.
Start with stable capture: mount the camera on a tripod and lock your settings in manual mode. That prevents the camera from raising iso and introducing extra grain while you adjust shutter and aperture.
Balance shutter speed so it freezes the subject but still gathers enough light. When you can, lower sensitivity and use longer exposures. This keeps images cleaner and preserves fine detail.
Shoot RAW to keep the most data for post. Use a slider in your editor for careful noise reduction so you retain natural texture. Apply reduction globally, then refine locally to protect edges.
- Tripod: reduce motion and allow slower shutter values.
- Manual mode: lock settings so the camera won’t change exposure mid-series.
- Practice: every shot needs a unique balance of shutter speed and iso; practice builds instinct.
“The best camera is the one you already have, provided you learn to use it in the dark.” — Vinicius Sanches
Newer cameras in 2026 handle higher sensitivity and processing better, but mastering capture and measured post steps remains the key to professional results.
Conclusion
Small camera choices made on location shape whether a frame needs heavy editing later, and that holds true for every night shot.
Mastering settings means you learn how shutter and aperture work with the available light. Use a tripod when you can and keep exposure steady to protect detail.
Keep sensitivity low whenever practical to reduce visible noise and grain. A correct in-camera exposure beats aggressive post work as the best way to fix grainy images.
Practice adjusting shutter speed and aperture for each subject and scene. Try different modes and review results to understand photos and improve your camera settings.
With steady capture, modest post editing, and time spent learning, you can turn rough frames into clean, professional-looking photos. Go shoot, experiment, and build confidence in low-light photography.