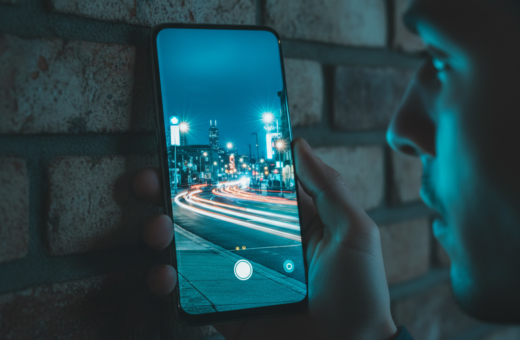
Many photographers struggle with low-light photography, yet modern devices can deliver impressive results with the right approach. This short intro explains how calm setup and simple changes in settings help you reduce blur and noise.
Good photography balances shutter speed, exposure, and ISO to control motion and light. When you manage these core elements, your images gain clarity and value.
Practical steps like using a stable support or a tripod and checking focus on the screen make a tangible difference. I printed a camping frame at Artbeat Studios and the 29/30 grade proved that careful setup yields gallery-grade output.
Whether you shoot with different cameras or lenses, focus on stabilization and vibration control. This approach helps you capture steady frames, avoid blur, and improve final image quality in many shooting situations.
Understanding the Physics of Low Light
Low-light scenes force a camera to trade between gathering more light and amplifying the signal. That trade defines how clean or noisy a final image will be.
The simplest control is shutter speed: it sets how long the sensor receives light. Faster shutter speeds freeze motion but let in less light.
Raising ISO amplifies the sensor signal to brighten the frame. Modern phones often hit the sweet spot between 400 and 800 ISO to keep color and detail intact while limiting grain.
Managing Dynamic Range
Dynamic range is about preserving bright highlights and dark shadow detail. Bright streetlights can clip highlights and flatten contrast.
Camera software may merge multiple frames to expand dynamic range, but stability remains the main factor. When you balance shutter and ISO, you control whether an image is clean or grainy.
- Use a shorter shutter to avoid blur; raise ISO only as needed.
- Watch for clipped highlights from strong light sources.
- Stability beats computational fixes when details matter.
Essential Preparation for Smartphone Photography
A little prep before you go can save an entire evening of unusable frames. John Eder, Multimedia Coordinator at the Garden, recommends a quick lens wipe with a soft microfiber cloth to reduce blur and improve clarity.
Arrive ready so you can focus on the scene and the light instead of fixing gear. Check battery levels and free up storage before you leave. A full charge and ample space let your camera run longer and capture more moments.
“Even basic maintenance like cleaning your lens goes a long way toward capturing magic,” — John Eder.
- Clean the lens with a microfiber cloth before events like Johnsonville Night Lights in the Garden.
- Scout spots such as the Bromeliad tree or the performance lawn to plan composition.
- Pack spare power and memory to avoid interruptions.
- Prepare small supports or a steady rest so you can keep the frame stable.
- Plan shots in advance to capture atmosphere instead of accidental, blurry documentation.
Good preparation reduces stress and helps you make thoughtful choices about exposure and composition when the scene matters most.
Using the Smartphone Timer for Sharper Night Photos Handheld
A small delay before the shutter fires can cut the tiny shakes that blur low-light scenes. This simple approach prevents the vibration caused by tapping the screen and improves final image clarity.
Why this works: When you wait briefly before capture, the camera has time to settle. That pause removes the micro-motion from a finger press so the sensor records a steadier exposure.
Why Delaying the Shutter Reduces Vibration
Pressing the shutter often introduces a tiny shake right as the shutter opens. In low light the camera may select a longer shutter speed, and that tiny motion becomes visible as blur.
- Many photographers follow the 1/250s shutter speed rule for handheld shooting; the delay helps when you fall below that speed.
- Use the built-in delay with other stabilization methods—lean on a wall, rest on a rail, or pair with a small tripod for even better results.
- Reducing vibration lowers noise and yields cleaner images in difficult shooting situations.
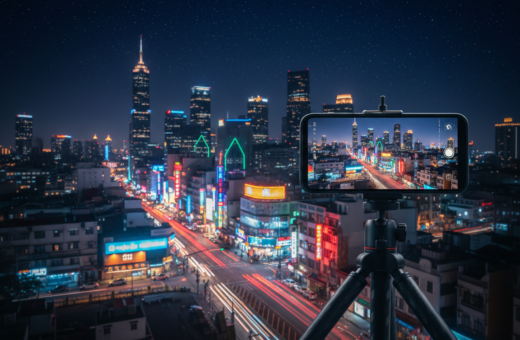
Optimizing Camera Settings for Night Scenes
A few deliberate settings changes can turn weak light into usable detail in your images. Start by choosing the right lens: the main 1x lens often uses a larger sensor and gathers more light than ultra-wide lenses.
Shoot RAW whenever possible. RAW files keep shadow data and give you more flexibility in post to reduce noise and recover detail.
Use Night Mode or multi-frame stacking to boost dynamic range, but keep the camera steady. Even short motion will blur stacked images.
Manually adjust shutter speed to control motion. Faster shutter reduces blur from moving subjects, but you may need to raise ISO and accept more noise.
Lock focus to prevent the lens from hunting in the dark. Stabilization helps when you must shoot without a tripod; when available, a small tripod will always improve image quality.
Review your settings before shooting. The right mode balances sensor sensitivity, shutter, and stabilization. Small changes to these settings often decide whether a photo is sharp or ruined by motion and noise.
Mastering Manual Focus and Exposure
Getting manual focus and exposure right turns uncertain dim scenes into predictable results. These controls give you the power to decide what is sharp and what falls away.
Locking Focus on Subjects
Lock focus on your main subject before composing. When autofocus struggles, switch to manual and nudge the lens until the subject looks crisp on the screen.
Tip: Zoom in briefly to confirm fine detail, then return to your chosen framing.
Adjusting Exposure Compensation
Use exposure compensation to stop bright highlights from blowing out. Slight negative compensation helps with streetlights and lit signs.
When you must shoot without a tripod, watch your shutter speed. A longer shutter needs extra stabilization to avoid a visible shake in the frame.
“Manual mode gives you creative control and predictable results when light is limited.”
- Practice locking focus and checking each frame.
- Use a tripod when possible to take time adjusting exposure.
- Double-check focus before pressing the shutter for final capture.
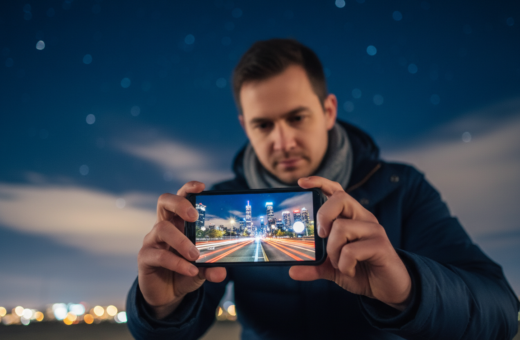
Stabilization Techniques Beyond the Tripod
When a tripod is unavailable, simple body and object supports give immediate stabilization. Tuck your elbows into your side and hold the camera close to reduce shake. This posture steadies the lens and lowers vibration so you can use a slower shutter speed when light is weak.
Lean and brace: press the camera against a wall, tree, or railing. Use a bag or jacket as a rest. These supports act like a compact tripod and help steady the shot when you must shoot without one.
Try a monopod as a lighter alternative to a tripod. Lying prone on the ground also creates a firm base. Control your breathing and fire the shutter at the end of an exhalation to cut micro-movements.
- Keep gear steady to avoid image blur from vibration.
- Practice each technique to learn which works best with your camera and lens.
- These methods let photographers use slower shutter and capture clearer photographs in low light.
“Small supports and mindful breathing save many otherwise ruined shots.”
Creative Approaches to Artificial Light
Artificial light can be treated like a brush; placed carefully, it sculpts form and mood in a frame.
Use street lamps, lanterns, or portable LEDs to add depth and separate foreground from background. Position your subject so side light reveals texture on a coat, wall, or pavement.
Using Light Painting for Texture
Light painting with a small flashlight during a long shutter lets you selectively brighten details. Move the beam slowly over surfaces to reveal grain, fabric folds, or architectural relief.
Reflections on wet streets or water double the available light and add atmosphere. Try placing the lens low to include these highlights; they often make a simple composition feel cinematic.
- Plan your exposure: adjust shutter and ISO so the camera records both ambient and painted light.
- Create silhouettes: backlight subjects to emphasize shape and mood.
- Experiment: different sources and angles change color balance and texture.
For trends in how cameras and AI affect creative lighting, read this short piece on evolving device capabilities: camera and AI advances.
Leveraging Burst Mode for Sharpness
Shooting a string of frames in quick succession raises the odds of finding a perfectly steady image. Burst mode lets your camera capture many exposures fast, which is ideal when light is low or motion appears suddenly.
Hold the shutter down to keep stability and avoid repeated taps that can cause shake. Pair burst mode with a faster shutter speed to freeze motion and reduce blur from moving subjects or camera sway.
Older DSLRs benefit because burst can reduce mirror-induced vibration, but this technique helps modern devices too. Review the sequence and pick the sharpest frame; often the second or third image is the best.
- Use burst when subjects move or when you shoot without a tripod.
- Keep an eye on storage—continuous capture fills cards quickly.
- Clear memory after a session so you don’t run out of space mid-shoot.
“A rapid series increases your chance of a clean image when light and motion conspire,”
For guided composition and portrait techniques at dusk, see this short guide on creating great frames: shooting portraits in low light.
The Role of Lens Selection in Dim Conditions
Lens selection changes how the camera and sensor respond to low light more than most settings do.
Focal length directly affects the minimum shutter speed you need to avoid blur. The 1/focal length rule is a simple guide: a 100mm lens generally asks for at least a 1/100s shutter speed for steady handheld work.
Shorter lenses make low-light photography easier. They let you use slower shutter speeds with less risk of motion. A lens with a wider aperture also gathers more light so you can reduce ISO and keep cleaner files.
- Pick the primary lens when possible — the main camera often pairs the best sensor with the best glass.
- Avoid heavy digital zoom— it cuts detail and hurts final image quality.
- Use a tripod or other stabilization when longer focal lengths force slower shutter and the subject is static.
Practical rule: when you must shoot handheld, favor shorter lenses. They increase your success rate and reduce the need for extreme stabilization or high shutter speeds.
Advanced Editing for Night Images
Selective editing is where a good capture becomes memorable. Start with targeted noise reduction to clean dark areas while keeping texture intact.
Adjust white balance on a calibrated screen so the colors keep the scene’s mood without looking forced. Small shifts often fix color casts from mixed light sources.
Use local adjustments like graduated filters to bring value to key parts of the frame. Dodge and burn subtly to restore depth and direct the viewer’s eye.
- Preserve fine detail with selective noise tools rather than global smoothing.
- Keep a TIFF or high-quality file for export to retain image detail.
- Every photographer develops a personal technique; aim to protect atmosphere while refining contrast.
Final checks on a calibrated screen help ensure prints match what you see. Thoughtful editing finishes the job, turning a solid capture into a polished piece of photography.
Avoiding Common Night Photography Mistakes
Many photographers trip up by trusting full auto when complex light and motion demand judgment. Check your camera mode and confirm settings before you shoot.
Avoid backlighting unless you plan to use flash or dial in exposure compensation. Backlight can render subjects as dark silhouettes and ruin an otherwise good image.
Use the right lens and watch ISO. A wrong lens or an overly high ISO will add unwanted noise and blur. If you must work without a tripod, favor shorter focal lengths for better stability.
Safety first: never balance on dangerous ledges to reduce vibration. A simple support or jacket on a railing beats a risky position every time.
- Lock focus and exposure to prevent hunting and soft frames.
- Plan your setup and carry a headlamp so you can work safely and save time.
- Resist over-editing; heavy corrections create halos and fake-looking images.
“Practice and patience beat instant perfection—night techniques improve with time.”
Final Thoughts on Capturing the Night
Breathe, plan, and experiment—those three steps improve results quickly. ,
Many photographers find the reward comes after repeated tries and small refinements. Each outing teaches better choices about light, stabilization, and settings.
Practice in safe, familiar places. Try different supports, adjust exposure, and review frames to note what works.
Keep creating with intention. Whether you use a tripod or freehand, aim to make images that tell a story and hold mood.
Keep learning, keep shooting, and you will see steady gains in both craft and confidence.