Mastering night photography with a smartphone starts with simple habits. Small adjustments in how you hold your device can improve exposure and reduce blur.
Photographer Digvijay Kumar shows how practical techniques make it possible to take stunning photos in low light. Good light control and the right camera settings help your image look crisp.
When you set your phone for longer time exposures, steady support matters. Use steady surfaces and a slow shutter to capture light without grain. Learn to use the self-timer and stable positions to cut shake and refine each shot.
Want quick tips and a checklist to improve your night shots? See this night photography tips guide for practical steps before a shoot.
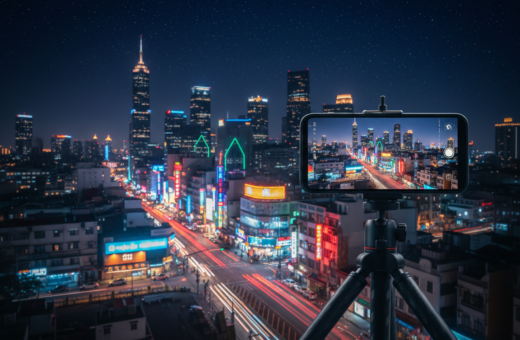
Why You Need to Stabilize Phone Against Wall Night Photography
A firm rest for your camera makes slow shutter work and captures more light. When shooting low-light scenes, even tiny motion creates motion blur. That blur wipes out detail and ruins otherwise good shots.
Using a tripod or a solid surface helps the camera use a slower shutter speed and lower ISO. This improves exposure and reduces noise in night shots.
Since ZHIYUN was established in 2015, demand for mobile gear that keeps devices steady has risen sharply. Many photographers combine built-in stabilization with an external support to get the best results.
Proper support makes it easier to tweak settings. You can lower shutter speed, adjust exposure, and lock focus without worrying about shake.
Keep your device steady and the camera can collect light longer, producing clearer, more vibrant night shots.
- Reduce motion blur to save detail.
- Use a tripod or firm surface to keep phone steady.
- Allow slower shutter speeds for better exposure.
Practical Techniques for Using Surfaces and Walls
A solid rest gives your camera the calm it needs to record brighter, clearer shots. Use nearby ledges, rocks, or railings as a simple platform so the device can hold a long exposure without vibration.
Using Walls and Rocks for Support
Place your smartphone on a flat edge or nestle it between two firm points to form a steady base. This helps the camera capture light trails and city lights with less blur.
For Pixel 4a (5G) owners, placing the device on a steady surface is required to unlock advanced astrophotography mode at 1x or higher zoom.
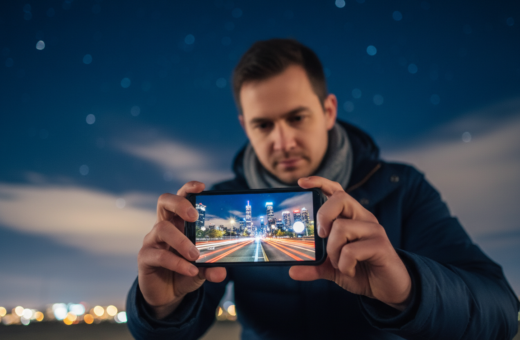
Utilizing Self-Timer to Prevent Shake
Try using the self-timer in your camera app so the shot fires after any contact ends. That prevents the small shake that happens when you press the shutter.
“Keep the device motionless during a long exposure to capture crisp images.”
- Use a tripod or solid surface to avoid shake when pressing the shutter.
- Combine natural or artificial light sources to add mood while you keep phone steady.
- Remember: even small vibrations can ruin long exposure city shots, so keep phone still for best results.
Optimizing Camera Settings for Low Light Performance
A few manual tweaks to exposure and white balance will improve low-light shots right away. These changes let your camera gather more light and cut noise, giving crisper images with richer tone.
Adjusting Exposure and ISO
To adjust exposure, tap the screen and drag the sun icon to brighten or darken the frame.
Start with a shutter speed near 1/4 second to capture more light. Lower the ISO when possible to reduce grain.
Leveraging Night Mode and HDR
Night mode merges multiple photos to boost contrast and reduce motion blur. Use it when light sources are mixed or dim.
HDR blends exposures to balance bright lights and dark shadows, which helps when artificial light hits parts of the scene.
Shooting in RAW Format
Try using RAW to retain full sensor data. RAW files give more leeway for color, contrast, and white balance edits later.
“A white balance of 4000K often adds a warmer, more pleasing tone to evening images.”
- Set white balance to 4000 for warmer tones.
- Use night mode for long exposure-like results.
- Shoot RAW and fine-tune exposure and contrast in post.
Final Thoughts on Capturing Stunning Night Images
Good low-light results come from combining steady support with the right camera settings.
Use night mode and long exposure techniques to give the sensor more time to capture light. Adjust exposure and keep ISO low for cleaner image detail.
Try the built-in night mode in your camera app and set white balance to match ambient tones. Pair these settings with a tripod or firm rest when shooting city lights and stars.
Practice regularly with your phone and learn how each setting changes a shot. Final edits in post-production are easier when the original exposure and focus are correct.
Your smartphone camera can take stunning night shots when you control light, timing, and support.